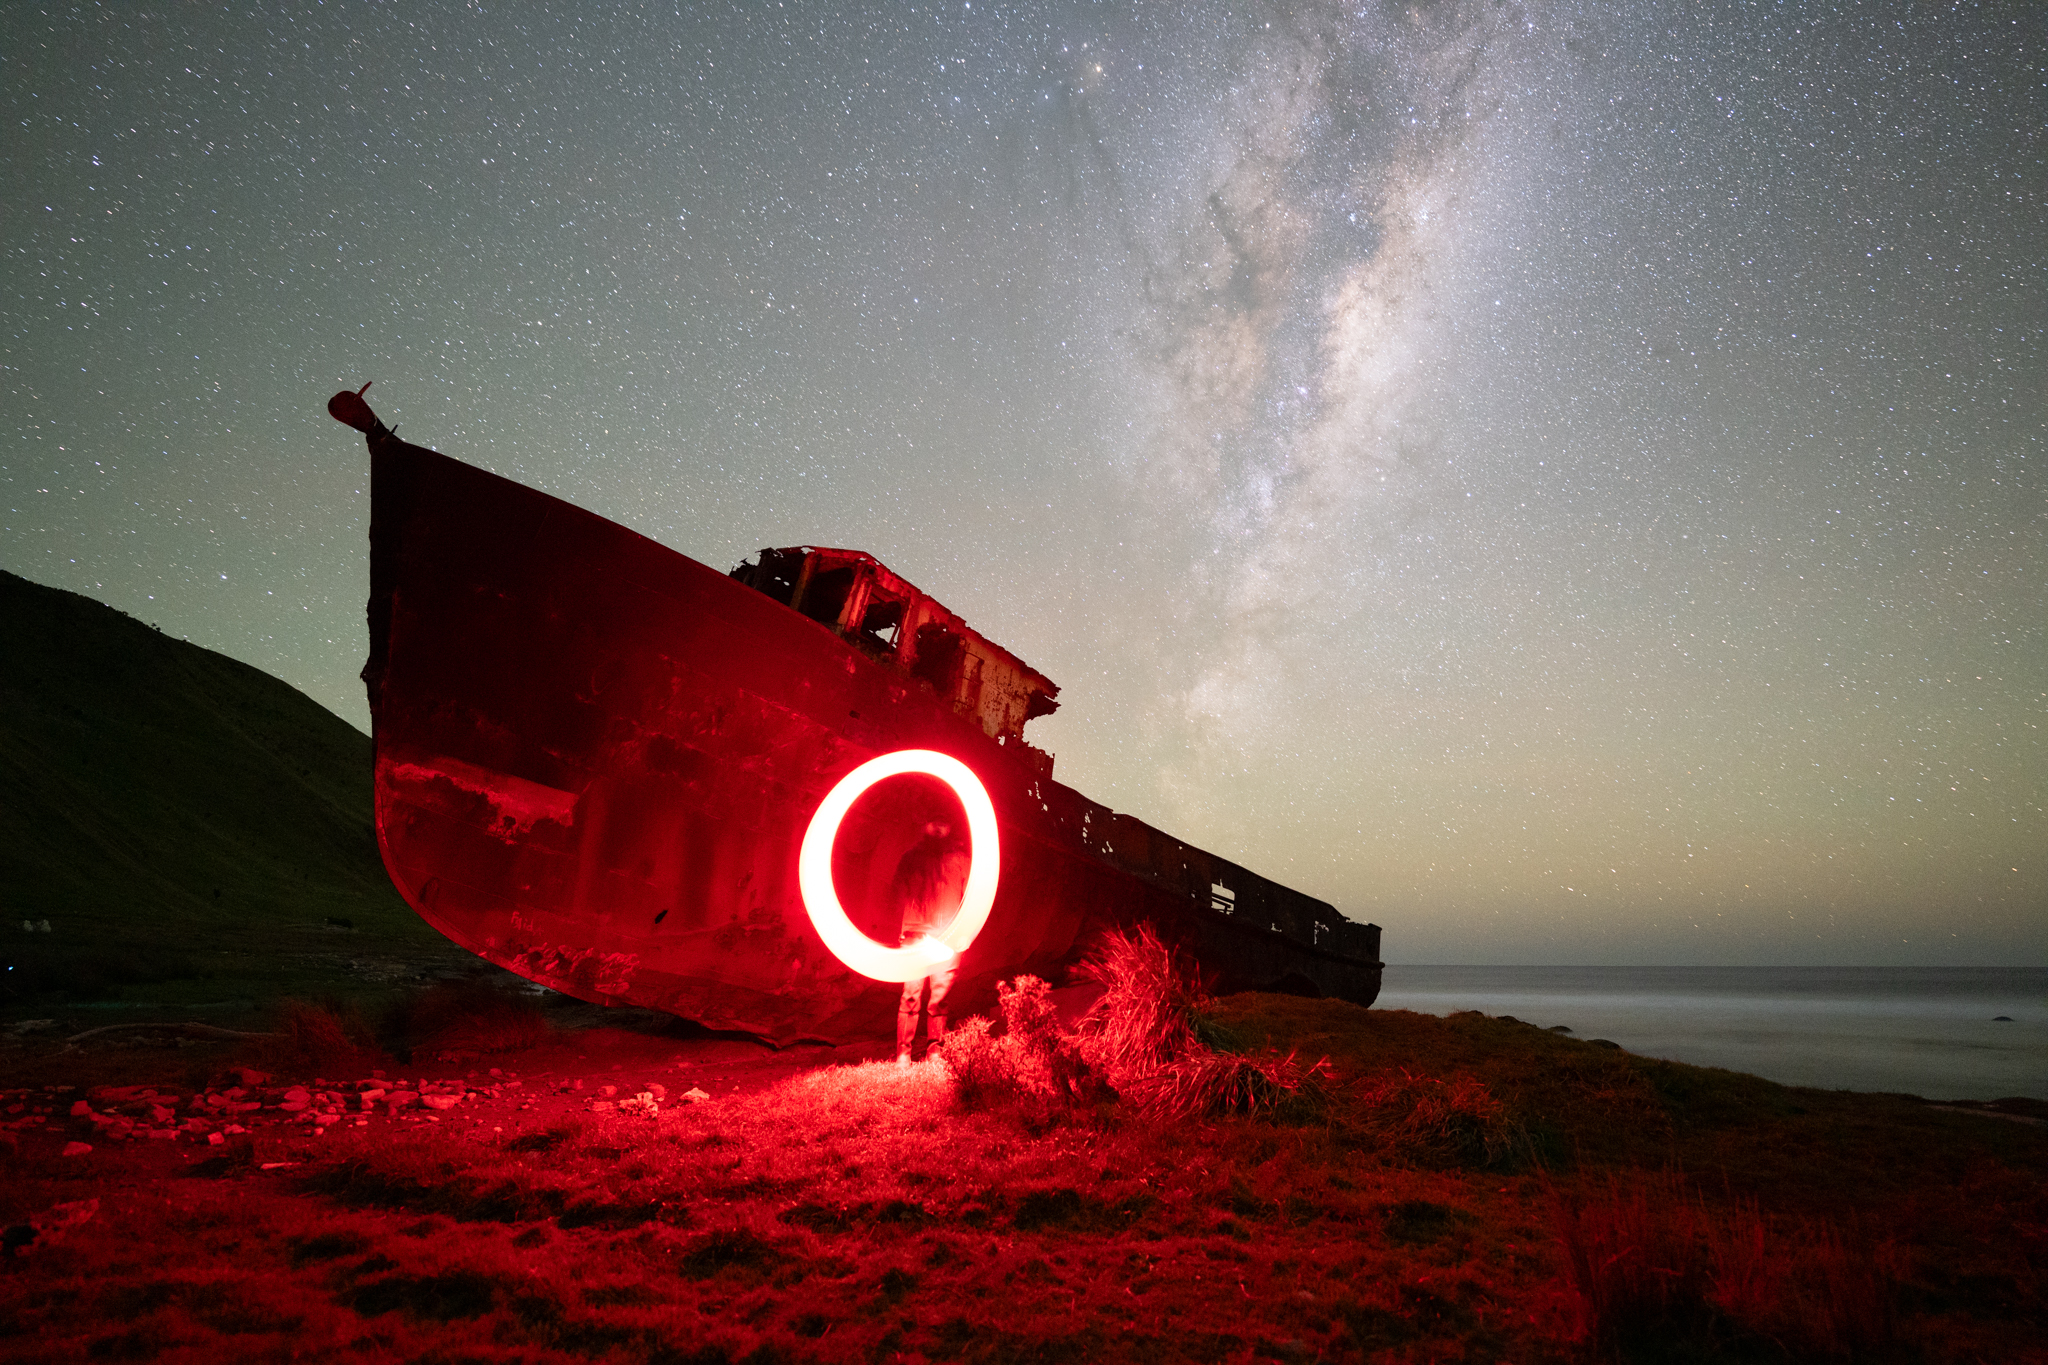


This image, titled The Wreck and the Wormhole, was captured at Te Kaukau Point on the remote Wairarapa coast of New Zealand. I had this shipwreck bookmarked for quite a while, but due to its distance—around 3.5 hours of driving through remote roads—I never quite made the trip. That changed on this shoot.
The photo features the remains of a shipwreck under the luminous Milky Way, with a circular light painting in the foreground. That light painting—me standing in frame with an LED tube—adds a nice contrast between the grounded wreck and the infinite sky, almost like a portal between two worlds.
The image captures the wreck of the Magnet, a fishing vessel that met its fate off the Wairarapa coast in 1989. The crew had anchored for the night without a watch, unaware that southerly winds would arrive earlier than forecast. By 3 AM, the Magnet had struck the rocks at Te Kaukau Point. Despite salvage efforts, strong winds and unforgiving tides ensured the ship was lost for good.
Now, decades later, the skeleton of the Magnet rests under the stars—a haunting, poetic subject for astrophotography.
Time & Location:
Photographed during Milky Way core season at Te Kaukau Point, New Zealand.
Interesting Fact:
The Magnet was declared a total loss despite the immediate efforts of its crew, a local farmer, and a marine surveyor. The wreck remains a ghostly relic of the sea, quietly weathering time beneath the cosmos.

I planned the shoot using the PhotoPills app to time the Milky Way core alignment with the shipwreck. The moon phase, weather, and light pollution (none LOL) were all taken into account. I also planned to incorporate some Hydrogen Alpha detail in the galactic core—so I packed my astro-modified camera and a narrowband filter.

Getting there meant a 3.5-hour drive through remote roads—no gas stations, very little cell coverage, and a lot of solitude. No permits required, just a sturdy vehicle and some stubborn dedication.


Once on location, I set up a dual-camera rig to capture both the sky and the foreground. My astro-modified Sony A7III on a Benro Polaris tracked the stars and captured 12 long exposures with an HA filter to pull out deep red nebulae detail in the Milky Way core. Meanwhile, a second setup with my Sony A7RV handled the foreground—a single 30-second exposure with an LED tube for light painting.
Environmental conditions were friendly enough—cool and crisp, no wind to shake the tracker, and minimal cloud cover. It was one of those rare nights when everything just clicked.
The only thing to look for were seals!!!!

Camera & Gear Used
Settings / EXIF
Software Used: PixInsight, Photoshop, PhotoPills
The sky images were stacked in PixInsight to reduce noise and enhance the intricate details of the galactic core. Foreground frames were blended separately to maximize dynamic range.


I used Photoshop for color balancing, star color enhancement, and contrast tuning. Special care was taken to blend the artificial light in the foreground with the natural ambiance of the stars, avoiding that "overcooked" look.
Sharpening, clarity adjustments, and subtle dodging brought out the fine textures in both the wreck and the Milky Way. The final blend gives the impression of a glowing wormhole opening above the ruined ship—hence the title.
I’m genuinely happy with how The Wreck and the Wormhole turned out. The light painting element was a new experiment for me, and I love how it added a unique, almost otherworldly vibe to the scene. It created this visual contrast between the wreck and the cosmos that I don’t think I could have achieved any other way.
It was a calm, peaceful night under the stars—made even better by the company.
A special thank you to my friend Navi for being there. Sometimes the quiet presence of a friend during these late-night shoots makes all the difference. Whether it's sharing a laugh, helping with gear, or just watching the stars in silence—it’s part of what makes these nights memorable.
I had a lot of fun - stading steady for 2 minutes to get long exposure pics :D

As an experienced photographer and creator, I’ll personally guide you through every step of the process—ensuring you leave inspired, confident, and equipped with the skills to create something amazing.